Getting started with the API
This page takes you from nothing to a working request in a few minutes: you make a token, send your first request with curl, read the answer, and then find your way around the full reference that every Tesria serves.
curl is a small program that sends a web request from a terminal and prints the answer. It is already installed on Macs, on Windows 10 and 11, and on almost every Linux. Nothing else is needed.
Throughout this page, your-server stands for your server’s address: whatever you type into the browser to open Tesria, without https://. For example, if you open Tesria at https://wiki-server.local, then https://your-server/api/spaces means https://wiki-server.local/api/spaces.
Before you start
An account that may use API tokens. Everyone may by default. If your profile says Your role does not allow API tokens, an administrator can turn on Use API tokens for your role in Admin, Roles (Admin is in the top bar; in a narrower window it is under More, and on a phone in the ☰ menu).
A terminal. Terminal on a Mac, PowerShell on Windows, or any Linux terminal.
Step 1: Create a token
Open your profile (your picture or initials at the top right of any page) and scroll to its API tokens card.
Give the token a name that says what will use it, such as Weekly report script. You will see the name in the list later, next to when the token was last used.
Under Expires, choose how long it lasts: 90 days unless you have a reason. You are told a week before it runs out, so the script does not stop by surprise.
Tick Read-only if the script only needs to look things up. A read-only token can read pages and search, and is refused anything that changes something. For this page’s last step, leave it unticked.
Choose Create token.
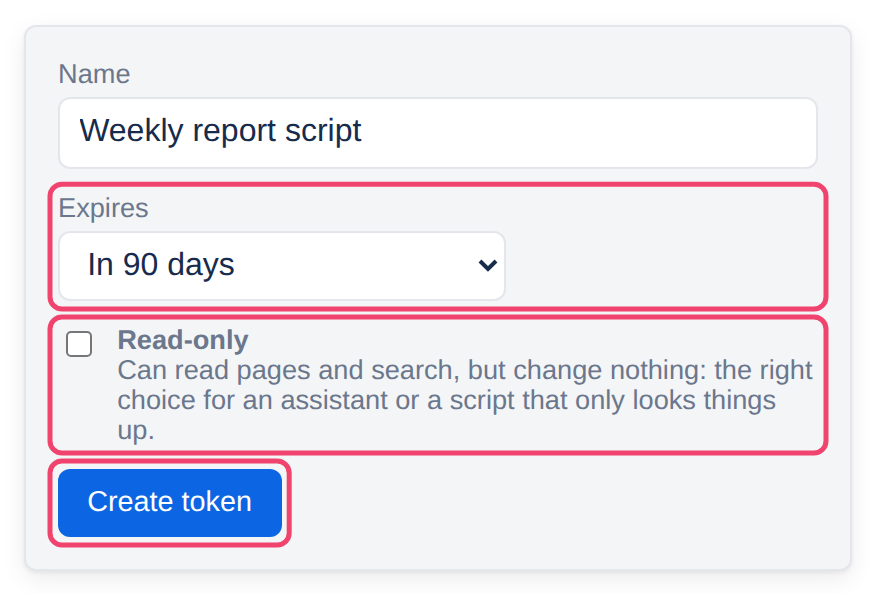
Tesria shows the token once, in a box that says Copy this token now, it won’t be shown again. Copy it, then choose Done. It starts with cct_. Tesria keeps only a fingerprint of it, which is why it cannot show it to you again: if you lose it, revoke it and make a new one.
Treat a token like a password. Anyone who has it can do what you can do, from anywhere that reaches your server, until it expires or you revoke it. Do not paste it into chat, email or a file you share. The one thing a token can never do is manage your account (tokens, sessions, password, two-factor, profile): those answer token_not_allowed.
Step 2: Keep the token handy in your terminal
Rather than pasting the token into every command, put it in a variable for this terminal window. It is forgotten when you close the window.
# Mac or Linux
export TESRIA_TOKEN="cct_paste-your-token-here"# Windows PowerShell
$env:TESRIA_TOKEN = "cct_paste-your-token-here"Step 3: Send your first request
Ask for the list of spaces you can see. The token goes in a header called Authorization, after the word Bearer:
# Mac or Linux
curl -H "Authorization: Bearer $TESRIA_TOKEN" https://your-server/api/spaces# Windows PowerShell: type curl.exe, because plain curl there is something else
curl.exe -H "Authorization: Bearer $env:TESRIA_TOKEN" https://your-server/api/spacesThe answer is JSON: a list, with one entry for each space. Shortened, it looks like this:
[
  {
    "id": "8c2e61f0-…",
    "key": "DEMO",
    "name": "Tesria Demo",
    "description": "Every element, with examples.",
    "isPublic": false,
    …
  }
]
If you see a list, everything works: your server, your token and your terminal. The id is how the API refers to a space when it needs a number rather than a key, for example when you create a page in it.
curl says “SSL certificate problem”? Your Tesria uses its own certificate, and curl keeps its own list of certificates it trusts, separate from your browser’s. Download the certificate once and tell curl to use it:
curl -o tesria-ca.crt http://your-server/ca.crt
curl --cacert tesria-ca.crt -H "Authorization: Bearer $TESRIA_TOKEN" https://your-server/api/spaces
The same certificate is behind the browser warning some people see; Trusting the local certificate explains it.
Step 4: Search, and read a page
Search works the way the search box does. Put the words after ?q=, and quote the whole address so the terminal leaves the ? alone:
curl -H "Authorization: Bearer $TESRIA_TOKEN" "https://your-server/api/search?q=kickoff"Each result has the page’s pageId, its space, its title, and a snippet: the passage that matched, with the matching words between **. Up to 50 results come back, best first, and only from pages you can read.
To read a page as Markdown, plain text that is easy for a script to work with, export it by its id:
curl -H "Authorization: Bearer $TESRIA_TOKEN" "https://your-server/api/pages/<page-id>/export?format=markdown"A page’s id is also in its address in the browser: it is the long part after /pages/.
Step 5: Change something
A first change that is easy to see and easy to undo: add a label to a page. Sending data takes two more options: -X POST says what kind of request it is, and -d carries the data, as JSON.
curl -X POST \
  -H "Authorization: Bearer $TESRIA_TOKEN" \
  -H "Content-Type: application/json" \
  -d '{"name":"from-the-api"}' \
  https://your-server/api/pages/<page-id>/labels
Open the page in the browser and the label is there. Remove it from the page as usual, or with the same address and -X DELETE plus /from-the-api at the end.
If the answer is {"code":"read_only_token", …}, the token was made read-only. Make another without Read-only ticked.
The reference: every request, in your browser
Every Tesria describes its whole API at https://your-server/api/docs. It is generated from the code of the version you are running, so it is always right for your server. It lists every request, what to send, and what comes back, with a ready-made curl command for each.
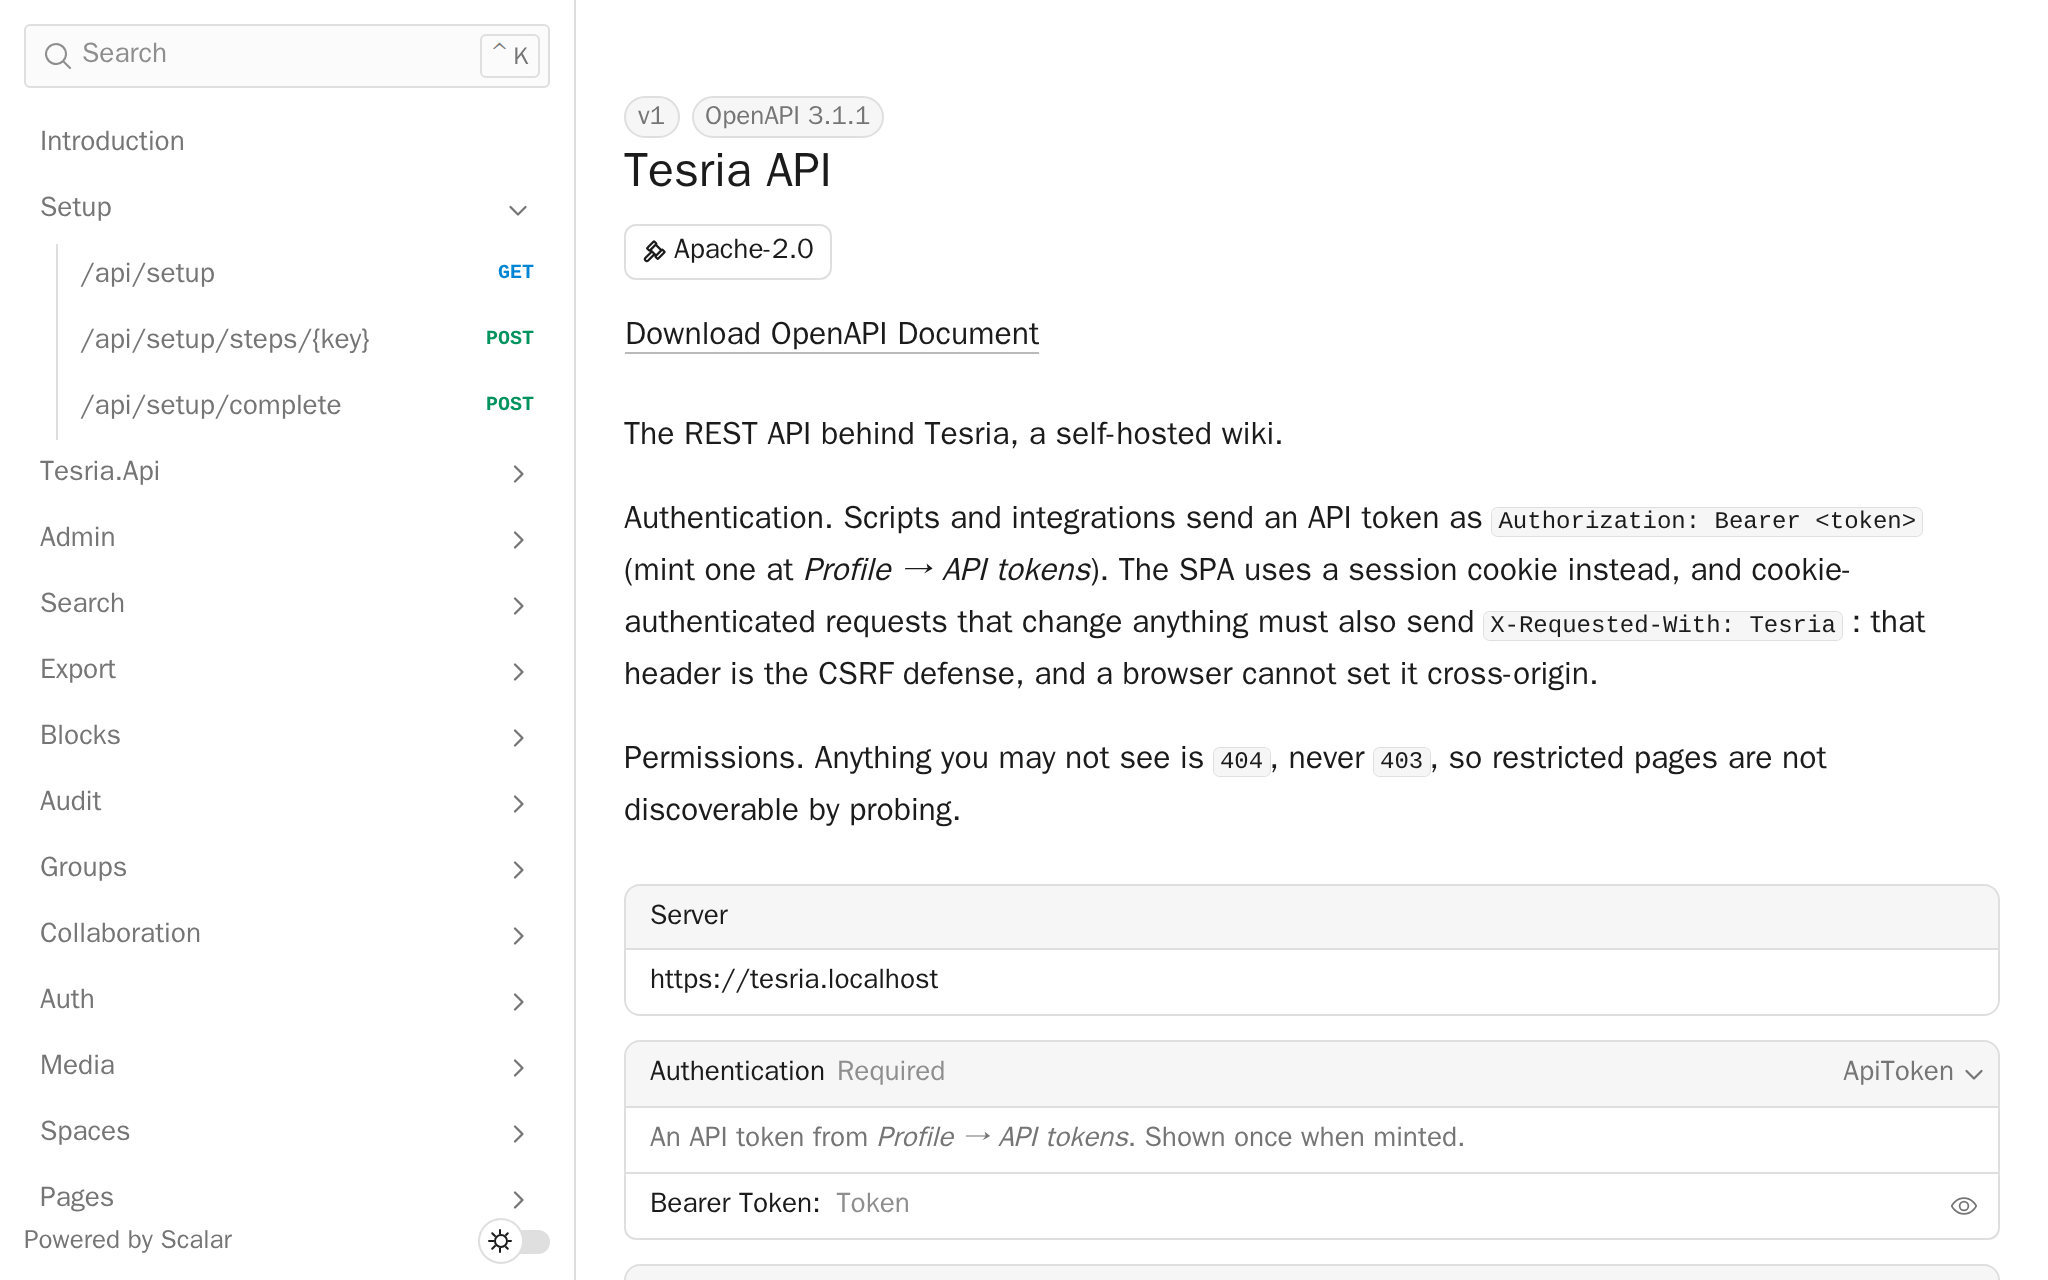
Trying a request: paste your token into Bearer Token under Authentication, then choose Test Request beside any request and Send. It runs against your own server, as you, so a request that changes something really changes it.
For tools that generate code: the same description, in the standard OpenAPI format, is at
https://your-server/api/openapi.json.
The reference needs no signing in to read: the shape of the API is not a secret, and every request still checks who is asking.
What a token can and cannot do
It acts as you. It sees the spaces and pages you can see, and a page you cannot see answers “not found”, exactly as if it did not exist.
A read-only token changes nothing. Every request that would change something is refused with
403and"code":"read_only_token".Some actions always refuse a token, read-only or not: the ones that ask you to confirm your password in the browser, such as permanently deleting a page from the trash, changing roles, or changing the branding. The answer is
403with"code":"reauth_required". Do those in the browser.It follows your account. If your account is suspended, or your role loses Use API tokens, every token you made stops working. They start working again if the right comes back.
Looking after your tokens
One token for each script or tool. Then you can revoke one without breaking the others, and the list shows which one was last used, and when.
Read-only whenever you can. A script that only reads cannot do damage if its token leaks.
Tokens do not expire. When a script is retired, choose Revoke next to its token. Anything using it stops working at once, and a revoked token cannot be brought back.
Next: Requests and responses explains the answers you get back, and how to write a whole page.
Applies to | Tesria 0.5 and later |
|---|---|
Updated | September 24, 2026 |
Changes | Revised. |