Reaching Tesria from anywhere with Tailscale

Tailscale joins your own devices (laptop, phone, the computer Tesria runs on) into one private network, called a tailnet, that works wherever each of them is: at home, at the office, on a phone’s data plan. If your devices already use it, Tesria can join too, and then you can open it from anywhere, with no port opened to the internet and no router settings changed.
Why this rather than putting Tesria on the internet? Nothing outside your tailnet can even reach it, so there is nothing for strangers to try passwords against. And because Tailscale gives Tesria a real certificate for its tailnet address, no device needs the trust this device step.
What it costs. Tailscale has a free plan for personal use, which is plenty for this. Check its pricing page for a team.
Before you start
Tailscale on your devices, signed in to the same tailnet: the ones you will open Tesria from.
Access to the Tailscale admin console at
login.tailscale.com/admin, to make a key and turn on HTTPS.
The computer Tesria runs on does not need Tailscale installed: Tesria runs its own small Tailscale container beside it.
Step 1: Turn on HTTPS for your tailnet
In the admin console, open DNS. Make sure MagicDNS is on (it usually is), and under HTTPS Certificates choose Enable HTTPS. This lets Tailscale give Tesria a certificate for its address. You do this once per tailnet.
Step 2: Make an auth key
An auth key lets a new device join your tailnet without anyone signing in on it. In the admin console, open Settings, then Keys, and choose Generate auth key.
Description:
Tesria.Reusable: off. It is used once, to join.
Ephemeral: off. Tesria should stay on the tailnet when it restarts.
Leave the rest as they are, and choose Generate key. Copy the key, which starts with
tskey-auth-: it is shown once.
Step 3: Put the key in .env
Open the .env file in the Tesria folder in a text editor, add this line with your key after the =, and save:
TS_AUTHKEY=tskey-auth-xxxxxxxxTesria takes the name tesria on your tailnet. To use another, also add a line such as TS_HOSTNAME=wiki.
Treat the key like a password. Until it is used or expires, anyone with it could add a device to your tailnet. .env is where Tesria keeps its secrets; never share it or put it in version control.
Step 4: Start the Tailscale service
In the Tesria folder, run:
docker compose --profile tailscale up -dThe --profile tailscale part is what starts it: Tailscale is off unless you ask for it. The first start joins your tailnet and fetches the certificate, which takes up to a minute.
Step 5: Open Tesria at its tailnet address
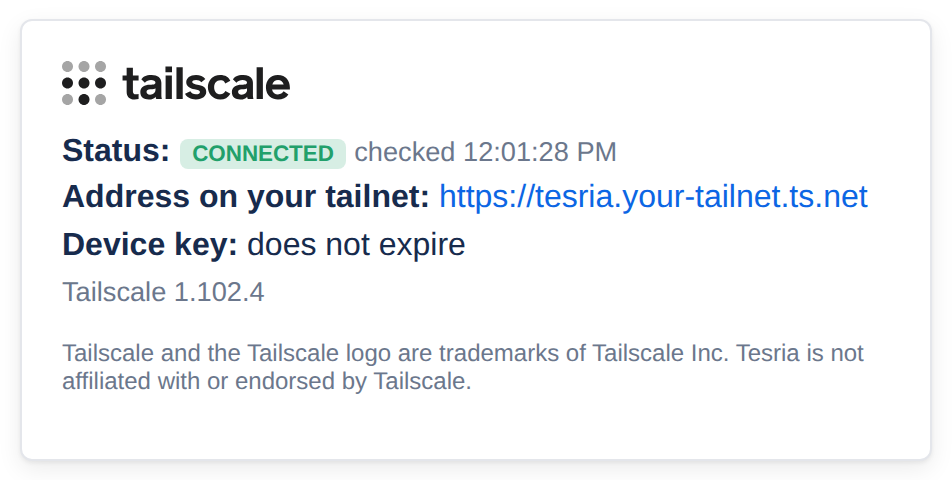
In Tesria, choose Admin, then Settings. The Tailscale card says whether it is connected and gives its address, which looks like https://tesria.your-tailnet.ts.net. Open that address from any device on your tailnet, wherever it is, and sign in as usual.
Step 6: Turn off key expiry for Tesria
Every device on a tailnet has to sign in again from time to time: after 180 days, unless you change it. For a person’s laptop that is a good thing. For Tesria it means it quietly drops off your tailnet one day, and you find out when you are away and cannot reach it. The card shows the date, and a reminder until you do this:
In the Tailscale admin console, open Machines.
Find tesria (or the name you chose), open its menu, and choose Disable key expiry.
The card then says the key does not expire.
Good to know
It is a second way in, not a replacement. Tesria still answers at its usual address on your network. Links in emails keep using the address in Settings.
Nothing is published to the internet. Tailscale can also publish a device to everyone (a feature it calls Funnel). Tesria’s setup turns that off, so only devices on your tailnet can reach it.
Everything works as usual, including editing a page with several people at once: the tailnet address goes through the same web server as the local one.
Who on your tailnet may reach Tesria is set by Tailscale’s access rules, in its admin console. Tesria’s own sign-in still applies to everyone who does.
To stop it, run
docker compose stop tailscale. To remove Tesria from your tailnet, also delete it under Machines and remove theTS_AUTHKEYline.
Inviting someone who is not on your network
Family or a friend in another town can use your Tesria through Tailscale too, without it ever being on the internet. They need a free Tailscale account of their own and the Tailscale app on their device.
Step 1: Share Tesria’s device with them
In the Tailscale admin console, open Machines, find tesria, open its ⋯ menu and choose Share. Tailscale gives you a link to send them; when they accept it, Tesria appears in their Tailscale, and nothing else of yours does. (Inviting them into your tailnet as a user works too, but gives them your other devices as well unless you limit it.)
Step 2: Make them an invite in Tesria
In Admin, Invites, make an invite as usual (see Invites). Because Tesria is on your tailnet, it shows two links: copy the one under Through Tailscale and send it to them. If Tesria emails the invite, both links are in the email, with the Tailscale one explained.
Step 3: They open it with Tailscale on
With the Tailscale app connected, the link opens Tesria, and they create their account. From then on they open the same address to sign in.
If it does not connect
The card says it needs a new auth key. The key was used already, had expired, or was mistyped. Make a new one (step 2), replace it in
.env, and run step 4 again.The card says it is not reporting. The Tailscale container has stopped. Run step 4 again;
docker compose logs tailscalesays why it stopped.The address does not open. Check that the device you are using is signed in to Tailscale on the same tailnet, and that HTTPS is on (step 1). The first visit after starting can take a few seconds while the certificate arrives.
Visitors keep their own address. Tesria records someone who comes in through Tailscale by their tailnet address, such as 100.101.102.103, the same one the Tailscale app shows for their device, so sign-in limits, alerts and the audit log tell them apart.
Already using an app connector or a subnet router?
If your tailnet already has a device that routes to your home or office network (Tailscale calls these subnet routers and app connectors), you can reach Tesria through it without anything above: add Tesria’s usual address to it in the admin console. Nothing changes in Tesria. The difference is the certificate: through a router you reach Tesria at its usual address, with its usual certificate, so each device still needs to trust it once. The Tailscale service above gives it a certificate every device already trusts.
Tailscale and the Tailscale logo are trademarks of Tailscale Inc. Tesria is not affiliated with or endorsed by Tailscale.
Applies to | Tesria 0.5 and later |
|---|---|
Updated | September 24, 2026 |
Changes | 0.6: inviting someone who is not on your network. |