Trusting the local certificate
The first time you open Tesria, your browser may stop you with a warning such as Your connection is not private or This Connection Is Not Private. Nothing is wrong with your server. This page explains why it happens and walks you through making it go away for good, one device at a time.
Why the warning appears
Every time your browser opens a secure web page, the server shows it a certificate: a kind of ID card that proves the server is who it says it is. The browser only accepts ID cards issued by a short list of organizations it already trusts, called certificate authorities. Public websites get their certificates from them.
A Tesria server on your own network cannot get one of those, because those organizations only issue certificates for addresses on the public internet. So Tesria makes its own. The connection is still fully encrypted; your browser just does not recognize who issued the ID card, so it warns you.
The fix is to tell each device, once, that certificates from your Tesria server are to be trusted. After that the warning is gone on that device for good, for every address the server answers on.
Does this apply to you? Only if you open Tesria at a local address, such as wiki-server.local or localhost. If you open it at a real web address, like wiki.example.com, and see a padlock, your server already has a public certificate and you can skip this page.
Before you start
Throughout this page, your-server stands for your server’s address: whatever you type into the browser to open Tesria, without https://. For example, if you open Tesria at https://wiki-server.local, then http://your-server/trust means http://wiki-server.local/trust.
About three minutes per device.
Permission to change the device’s settings. On a computer that means an administrator account, because the certificate is added for everyone who uses it.
The device on the same network as the server, the same as when you use Tesria.
The easy way: the Trust this device guide
Tesria has a guide built in that asks which device you are on, fills your server’s address into a small script, and tells you exactly what to click. There are three ways to open it:
From your profile. Once you are signed in, open your profile (your picture or initials at the top right of any page) and choose Set up this device under Trust this device.
From the sign-in page. Choose Trust this device under Did your browser warn that this site is not secure?.
By its address. Type
http://your-server/trustinto the browser. Notehttp, nothttps: the guide is served without encryption on purpose, so a device that does not trust the server yet can open it with no warning. This is the easiest way on a phone.
If http://your-server/trust does not open, your network or security software may block plain http addresses. Open https://your-server/trust instead and click past the warning once, as described under Getting past the warning the first time.
First, open the guide
Open it any of the three ways above. It starts by explaining the warning, then has four numbered steps. The steps below have the same numbers, so you can follow along.
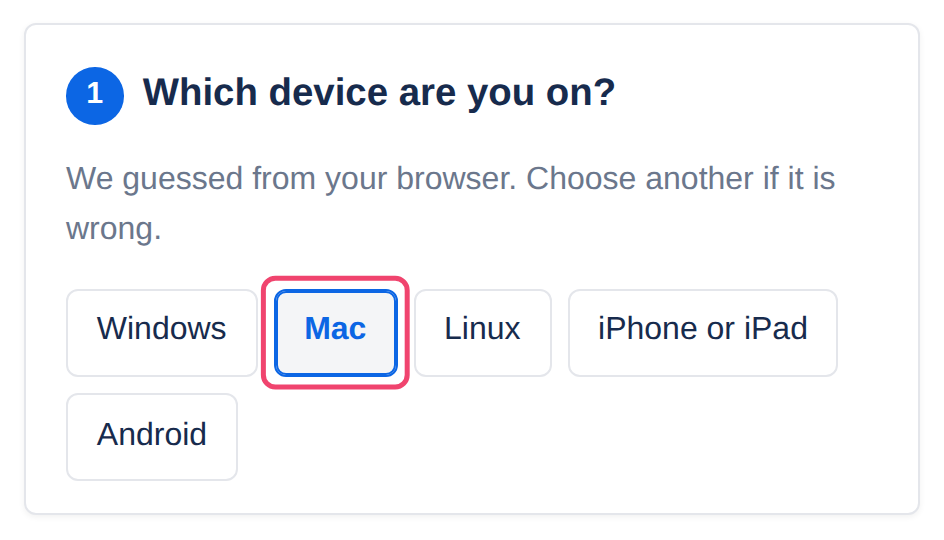
Step 1: Which device are you on?
The guide guesses your device from your browser. If it guessed wrong, choose the right one. Everything below changes to match.
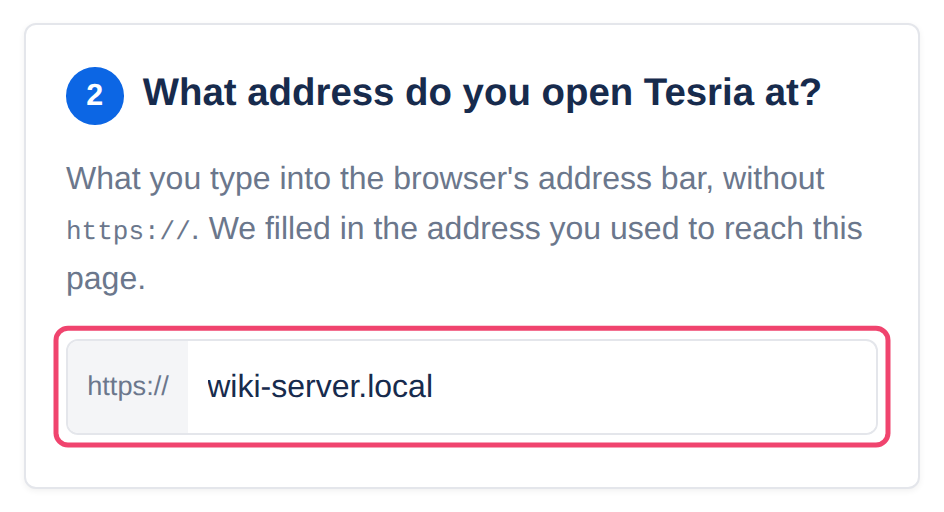
Step 2: What address do you open Tesria at?
The guide fills in the address you used to reach it. It has to be the address you normally open Tesria at, because that is the address the script will trust. If you type a numeric address such as 192.168.1.50, the guide explains how to find your computer’s name instead, since certificates are issued for names.
Step 3: Trust the certificate
This is the part that does the work, and it differs a little by device. On a phone the guide takes you through the Settings app; see On a phone below.
On a Mac or Linux, you download a small script with your address already in it and run it with one line, which the guide gives you to copy. It asks for your password, because adding a trusted certificate changes a setting for the whole computer.
On Windows, there is no file to download. You copy one line into PowerShell and press Enter. Windows then asks whether to install a certificate from Caddy Local Authority: that is your server, so choose Yes.
Why a line and not a script on Windows? Windows refuses to run script files downloaded from the internet unless you change a security setting, and on a work computer that setting is often locked. A line you paste in yourself is not affected, and it needs no administrator, because it trusts the server for your own Windows account.
Typing your password shows nothing. In Terminal, and in most command windows, the password you type is hidden completely, not even as dots. That is normal: type it and press Return.
Step 4: Check it worked
Quit your browser completely and open it again. Closing its windows is not always enough, because some browsers keep running in the background: in Chrome or Edge, type chrome://restart or edge://restart into the address bar; in Safari, press ⌘ Q. Then choose Open Tesria securely at the end of the guide. If Tesria opens with no warning and the address bar shows a padlock, you are done on this device.
Still says “Not secure”? Check that you opened Tesria by its name, such as wiki-server.local, and not a number such as 192.168.1.50. A number never matches the certificate, however it is trusted. The guide’s last step lists the other causes.
Getting past the warning the first time
To sign in and reach your profile before the device trusts the server, you can tell the browser to go ahead this once. It is safe here because it is your own server on your own network. Do not do this for websites you do not recognize.
Browser | What to choose on the warning page |
|---|---|
Chrome, Edge, Brave | Advanced, then Proceed to your-server (unsafe) |
Safari | Show Details, then visit this website, then Visit Website |
Firefox | Advanced…, then Accept the Risk and Continue |
Some browsers offer no way past, for example on a work computer your IT department manages. Use http://your-server/trust instead.
On a phone
On an iPhone, iPad or Android phone there is no script: you install the certificate and then switch trust on in the Settings app. Open http://your-server/trust on the phone and the guide shows the steps for it. On an iPhone or iPad, use Safari; other browsers there cannot install certificates.
iPhone and iPad
In Safari, open
http://your-server/trust, choose iPhone or iPad, and tap Download the certificate. Tap Allow. It says a configuration profile was downloaded; that is the certificate.Open the Settings app. Tap Profile Downloaded near the top, then Install, enter your passcode, and tap Install twice more.
Go to Settings, General, About, Certificate Trust Settings. It is at the very bottom of About.
Switch on the certificate named Caddy Local Authority and tap Continue. Without this step the certificate is installed but not trusted, and the warning stays.
Android
Open
http://your-server/trust, choose Android, and tap Download the certificate. It is saved astesria-ca.crt.Open Settings and search for CA certificate. The menus vary between phone makers; it is usually under Security and privacy, More security settings, Encryption and credentials, Install a certificate.
Choose CA certificate, then Install anyway, and confirm with your screen lock.
Pick
tesria-ca.crt. Android then says your network may be monitored, as it does for any certificate you add yourself.
Doing it by hand
If you would rather not use the guide, or you are setting up many computers, the same scripts are here. They are the ones the guide gives out, before your address is filled in.
trust-ca.sh is for Mac and Linux, and trust-ca.ps1 for Windows. Each needs your server’s address, and you can give it one of two ways:
Edit the script. Open it in a plain text editor (TextEdit, Notepad or any code editor) and change the one marked line near the top:
# Mac and Linux: trust-ca.sh
TESRIA_ADDRESS="localhost"          # before
TESRIA_ADDRESS="wiki-server.local" # after: your address# Windows: trust-ca.ps1
$TesriaAddress = "localhost" # before
$TesriaAddress = "wiki-server.local" # after: your addressOr give the address when you run it, and leave the file alone:
# Mac or Linux, in Terminal
bash ~/Downloads/trust-ca.sh wiki-server.local# Windows, in PowerShell
powershell -ExecutionPolicy Bypass -File "$env:USERPROFILE\Downloads\trust-ca.ps1" wiki-server.localOn Windows, -ExecutionPolicy Bypass is what lets the script run: Windows blocks script files by default, with the message running scripts is disabled on this system. This allows the one script, once, and changes no setting. If your employer has locked it, scripts cannot run at all; use the single line instead, which is what the guide gives you:
$c = "$env:TEMP\tesria-ca.crt"; Invoke-WebRequest -UseBasicParsing -Uri "http://wiki-server.local/ca.crt" -OutFile $c; Import-Certificate -FilePath $c -CertStoreLocation Cert:\CurrentUser\RootThat trusts the server for your Windows account. The script trusts it for everyone who uses the computer, which is why the script needs an administrator and the line does not.
Either way, the script downloads the certificate from http://your-server/ca.crt, shows its fingerprint, adds it to the device’s trusted list, and checks that https://your-server now opens without a warning.
Just the certificate
Some tools and devices want the certificate file itself. It is always at http://your-server/ca.crt and downloads as tesria-ca.crt.
Firefox
Firefox keeps its own list of trusted certificates, separate from your computer’s, so it needs one more step after the others:
Download the certificate from
http://your-server/ca.crt.In Firefox, open Settings, then Privacy & Security, scroll down to Certificates, and choose View Certificates….
On the Authorities tab, choose Import…, pick
tesria-ca.crt, tick Trust this CA to identify websites, and choose OK.
If the warning comes back
Quit the browser completely and open it again. Browsers remember the old answer until they restart.
Check the address. A device trusts the server, but a browser only stops warning when it reaches it by a name. Opening it by number, such as 192.168.1.50, can still warn.
Was the server reinstalled or moved? If its certificate storage was deleted, for example with
docker compose down -vor a move to a new machine without it, the server made a new certificate. Every device needs these steps again. Ordinary restarts and upgrades never do this.
Applies to | Tesria 0.5 and later |
|---|---|
Updated | September 24, 2026 |
Changes | Revised. |