Creating a space
A space is a home for a set of pages that belong together, like a binder on a shelf. Each space has its own page tree, its own home page, and its own list of who can read and edit it. This page helps you decide what deserves a space of its own, then walks you through making one.
What a space is for
Give something its own space when it has its own audience: a group of people who read and write it together, and who you might want to give different access from everyone else. Some common ways teams divide things up:
By team, such as Engineering, Marketing or People: each team owns its own processes and notes.
By project, such as Kestrel launch or Office move: the work has a start and an end, and people from several teams join in.
By audience, such as Team handbook or Customer help: the same material is read by people who should not see everything else.
Start with fewer, larger spaces. It is easier to find things in three well-organized spaces than in twenty small ones, and a page can be moved to another space later with everything under it.
Before you start
You need the right to create spaces. Everyone has it by default; if you do not see a New space button in step 1, an administrator has turned it off for your role, and they can create the space for you.
Step 1: Open Spaces and choose New space
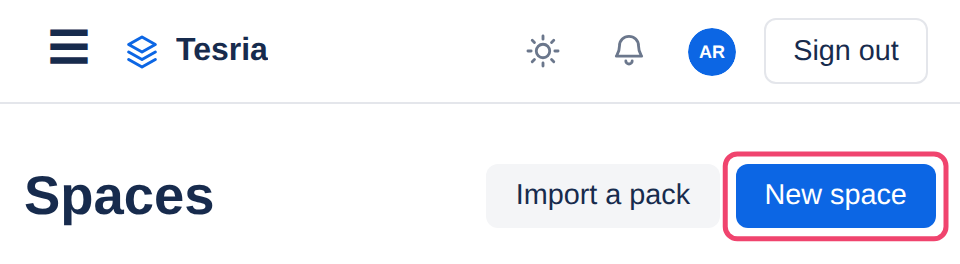
Choose Spaces at the top of any page, then New space at the top right.
Step 2: Give it a key and a name
A short form opens above the list.
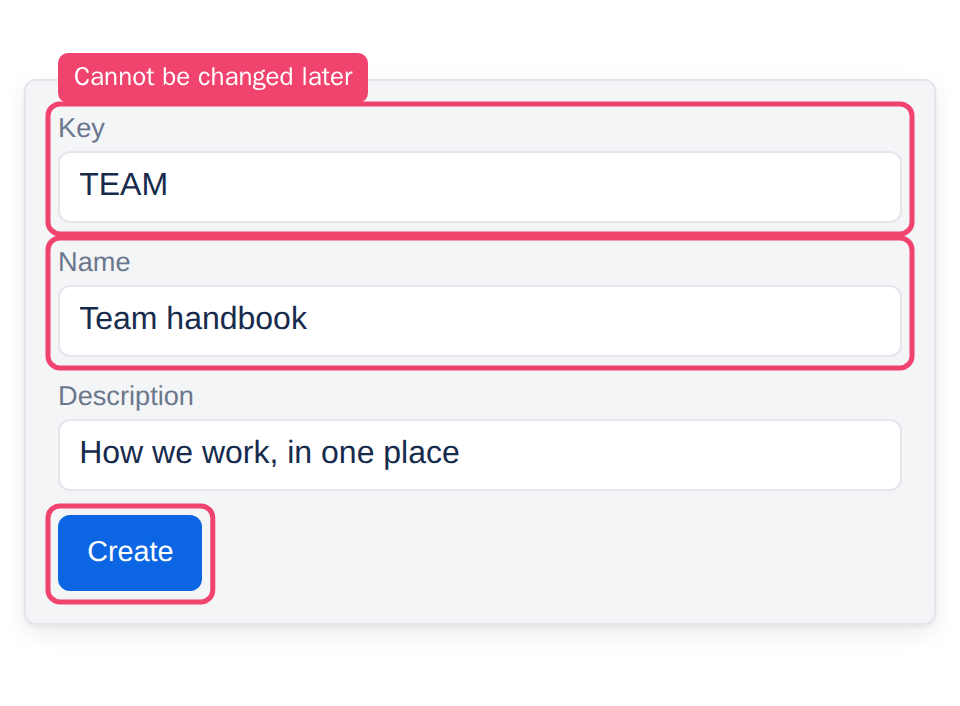
Key: a short code for the space, such as TEAM or ENG2: two to 50 letters and digits, starting with a letter. It becomes part of every page’s address, as in /spaces/TEAM, so it cannot be changed later. Tesria makes it capitals as you type.
Name: what everyone sees in lists and at the top of the space, such as Team handbook. You can change it later in the space’s settings.
Description: optional. One line on what the space is for, shown on the Spaces page to help people pick the right one.
Step 3: Choose Create
It is the button at the end of the form, boxed in the picture above. The space appears in the list. Open it to find an empty home page with a Create the first one button.
What a new space starts with
Open to everyone signed in. Anyone with an account can read it, edit it and change its settings.
Not public. People who are not signed in cannot see it.
An icon made from its key, which you can change to an emoji or a picture.
Every export allowed: PDF, Markdown, HTML, a static site and a wiki pack.
Want it private? A new space is open to everyone signed in, which is right for most team spaces. For anything that should be seen by only some people, such as salaries or a confidential project, limit it straight away, before you write anything in it. See Who can see a space.
Next steps
Write the first page. A good first page says what the space is for and who looks after it. See Creating a page.
Give it an icon so people recognize it at a glance. See Space icons.
Decide who can see it. See Who can see a space.
Applies to | Tesria 0.5 and later |
|---|---|
Updated | September 24, 2026 |
Changes | Revised. |