Groups
A group is a named set of people, such as Marketing or the Berlin office. Instead of sharing a space or restricting a page person by person, you give access to the group. When someone joins the team, you add them to the group once, and they can reach everything it opens.
To open it, choose Admin, Groups (Admin is in the top bar; in a narrower window it is under More, and on a phone in the ☰ menu).
Creating a group
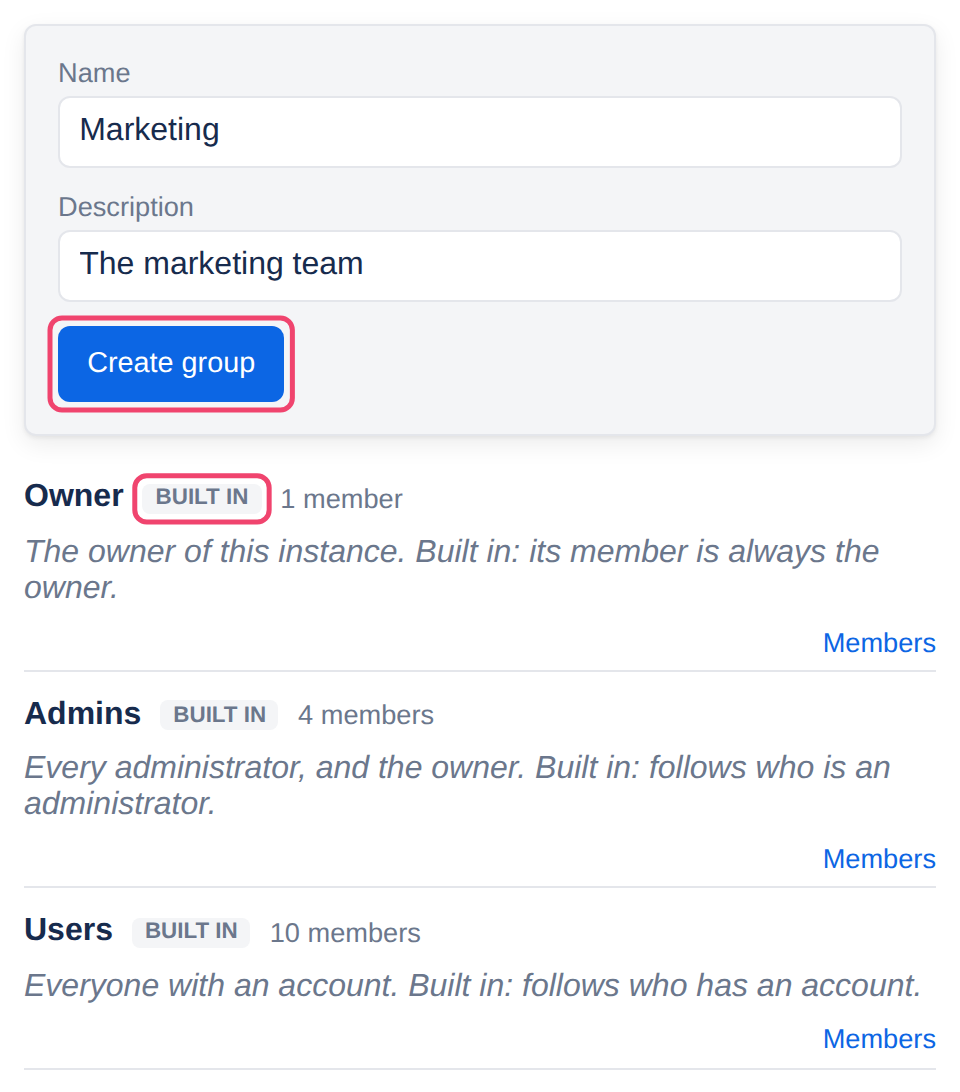
Step 1: Name it
Something people will recognize in a list, such as Marketing. The description is optional.
Step 2: Choose Create group
It appears in the list below.
Step 3: Add people
Choose Members in its row. Pick a person from the list and choose Add member. Remove takes someone out, after asking, since they lose anything they could reach only through the group.
Step 4: Use it
In a space’s Permissions, or a page’s Restrictions, choose Group and then the group. See Who can see a space and Restrictions.
The built-in groups
Owner, Admins and Users are listed first, marked built in. Their members follow each account’s role, so they are always up to date: Users is everyone with an active account, Admins is the administrators and the owner, and Owner is the owner. Nobody can rename or delete them, or add and remove members by hand, and a suspended account drops out of them. They are handy for, say, letting the Admins group manage a space.
Renaming and deleting a group
Edit changes a group’s name and description. Delete removes the group, after asking, along with any access given to it in spaces and pages. Its members keep their accounts.
If a group is the only way into a space or a page, Tesria refuses to delete it and says where: removing that access would open the space or page to everyone. Give the access to someone else first.
Applies to | Tesria 0.5 and later |
|---|---|
Updated | September 24, 2026 |
Changes | Revised. |